Showing posts with label OPI. Show all posts

Tuesday, 10 June 2014

Pantone Colour of The Year 2014 - Radiant Orchid

For 2014 Pantone's colour of the years is a warm dusky lilac shade - Radiant Orchid, you can click here to view more information on this year's colour of the year. 


Here are a few gorgeous shades in the same vein as Pantone's Radiant Orchid, you can click on the original post link to find out more about the shades. 

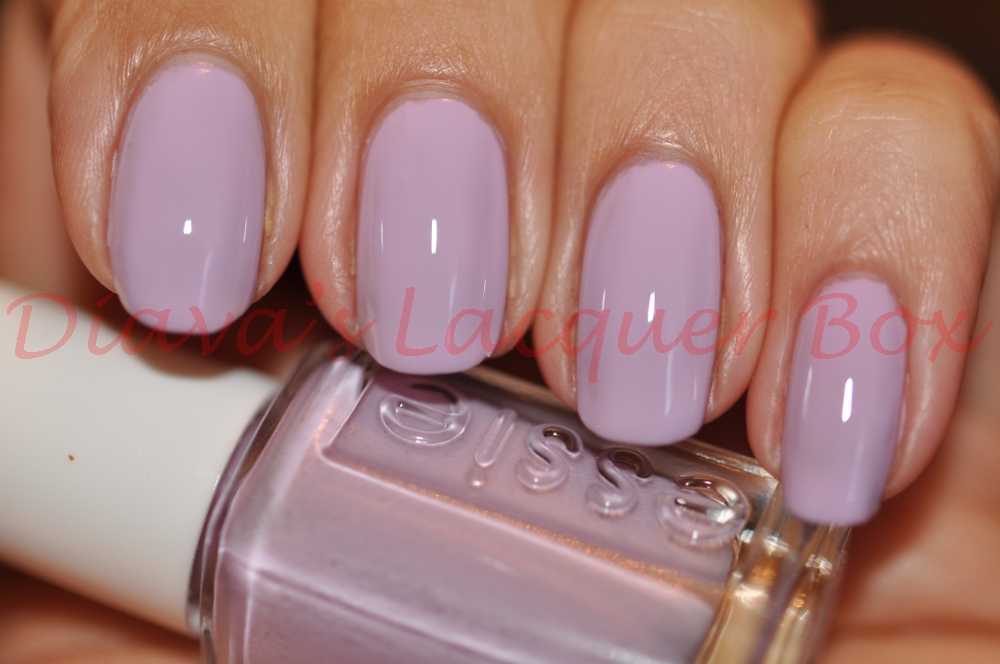
Essie - Nice is Nice original post

OPI - Planks A Lot original post

Zoya - Perrie original post

What do you think of Pantone's Colour of the year? Do you have any suggestions for more similar shades?

Saturday, 24 May 2014

Cocktail Manicures - No. 2 Strawberry Fields Daiquiri - With Born Pretty Fruit Decals and China Glaze Strawberry Fields

Next up in Cocktail Manicures is a Strawberry Daiquiri, and what better polish to use as a base than one of China Glaze's greatest creations: Strawberry Fields. 

Strawberry Fields Daiquiri

This Manicure features China Glaze Strawberry Fields as the base polish, OPI I Lilly Love You from the Nice Stems collection on the tips, and the pink Strawberries from Born Pretty's 3D Fimo fruit nail decals, which was sent for review, you can read a full tutorial on how to apply the decals over here: 

Strawberry Daiquiri Cocktail
Photo by D Sharon Pruitt
China Glaze Strawberry Fields has got to be one of my favourite polishes from China Glaze, it's the perfect pink for summer, a build-able jelly base (this was two coats) with gorgeous glass flecks of gold it literally beams in the sunshine, and fits perfectly for a bright vibrant cocktail themed manicure. OPI I Lilly Love you is great for complimentary tips, the polish is a very sheer pink toned glitter with lots of lovely random shaped flecks. They look pretty great combined together.


You can find the 3D Fruit shaped nail decals from Born Pretty over here and don't forget your 10% off code CEB10 :) 

Wednesday, 7 May 2014

Born Pretty Silver Nail Studs Review

The Wonderful people at Born Pretty Store recently sent me these silver nail art studs to review.
I've include the one penny piece in the picture below to give you an idea of the actual size of the studs.


These particular studs were 2mmx2.5mm, there are other sizes and colours available as well. 


Tools
  • Base Nail Polish
  • Born Pretty Nail Art Studs
  • Seche Vite Top Coat recently thinned with Seche Restore
  • Two hoof sticks, one with some cotton wool attached
  • A clean surface to work on
  • A lot of patience :)


How
  • Apply base polish and finish with Seche Vite to speed up the dry time
  • Ensure the nail is completely dry 1-2 hrs
  • Decide where you want the studs to go and apply one tiny drop of Seche Vite to a small spot on the nail, where you want to place the first stud
  • Apply a tiny amount of Seche Vite to the cotton covered hoof stick
  • Use the cotton covered hoof stick to pick up the stud
  • Carefully place the stud over the spot of Seche Vite
  • Use the other hoof stick to carefully reposition the stud exactly where you want it
  • Repeat this process for placement of all other studs
  • Optional finish with top coat to further seal the studs

The Results - 3 different looks

A Line of Studs

with Illamasqua Scorn a matte finish polish and Illamasqua Load for the accent nail


This was probably the trickiest out of the 3 manicures, it's quite hard work to get the studs perfectly straight.

Random Studs

with OPI Suzi Skis in The Pyrenees Suede


This was definitely the easiest of the 3, as there's a lot more room for error, and the randomly placed spikes really look effective.

French Studs

With Nails Inc Magnetic Effect Polish in Trafalgar Square


Probably the least practical of the bunch, but perfect for a night out, a very unique and punky take on the french manicure, and the magnetic polish really works great as a base for studs. 

You can create so many different style manicures with these studs, I opted for an accent nail, but there's no reason you can't do a whole hand. The tiny size of the studs means you do need a rather steady hand and a lot of patience, I imagine the larger studs would be far easier to apply. 

I found these manicures lasted around 1-2 days before the first stud dropped. To be honest it's definitely not an every day manicure, as the studs can get in the way, you certainly want to take care wearing hosiery with these studs :) but for a night out they make for a really cool alternative manicure. I really enjoyed these and will definitely be re-using them! 

if you're interested in trying these out for yourself click here, you get 100 studs for $4.33, and you can receive 10% off your order by using the coupon code below :D

Monday, 31 October 2011

Halloween Nail Art 2011 - With OPI Spookettes Collection

An Alternative Glow In The Dark French Manicure for Halloween:

First up I applied Nail Tek Foundation as base coat, then 2 coats of Mummy Knows Best. Once dry I applied 3 coats of Zom-Body To Love, followed by the spider nail decal once dry (See bottom of post for tips on decal application).


I applied black tips freehand using I Only Date Werewolves, (mini bottle brushes are brilliant for french tips) followed by Seche Vite Top coat:


On the back of the box, they have several nail art suggestions to create using the polishes and decals from this set, I went with welcome To Spider's Corner (See photo below) but I opted for standard french tips over the chevrons.


Water Nail Decals:

You Also get a set of water nail decals with the Spookettes Collection, there are two of each design so ten in total, the bat spider web and spider are all black and the jack o lantern and trick or treat are white. They are pretty easy to apply, you peel off the see through sheet, cut out the decal you wish to use and place it in warm water for 10 seconds. Then you dampen the (fully dry) nail you wish to apply the decal to, peel off the decal (it slides off easily) and apply it to the nail. Once you've got it positioned where you want it you just dab it dry and apply top coat. I used tweezers to make it easier to apply the decals.


OPI Spookettes set consists of 4 mini polishes, (1 is a glow in the dark colour) and a sheet of Halloween themed water nail decals. To see more swatches of all the colours from this range click here or the photo

Sunday, 30 October 2011

Halloween Week - OPI Spookettes Swatches Part 4 Zom-Body To Love

Last but certainly not least from OPI Spookettes is Zom-Body To Love, the glow in the dark polish :)


This was three coats of Zom-Body To Love over Mummy Knows Best. This is the first glow in the dark polish I've ever tried so I'm pretty excited about it :) Zom-Body To Love is an extremely sheer "minty" green, it definitely works best layered over another colour. The glow effect is really strong if you hold your hands up to a light for a few seconds before turning out the lights :) This is definitely the star of the Spookettes Collection, and is a great polish to use for some Halloween themed manicures! I'll be posting mine shortly


OPI Spookettes set consists of 4 mini polishes, (1 is a glow in the dark colour) and a sheet of Halloween themed water nail decals. To see more swatches of all the colours from this range click here or the photo

Next Up: A Halloween themed mani, using one of the nail decals! 

Halloween Week - OPI Spookettes Swatches Part 3 He's My Boo

Next up from OPI Spookettes is He's My Boo:


He's My Boo is a typical Halloween pumpkin orange creme shade, the colour looks a lot more saturated in the first photo than it does in real life, nice formula and opaque in 2 coats, I have to admit so far I'm definitely preferring OPI's last year offering for Halloween, but I'm looking forward to testing out the Glow in the dark shade next :D 


OPI Spookettes set consists of 4 mini polishes, (1 is a glow in the dark colour) and a sheet of Halloween themed water nail decals. To see more swatches of all the colours from this range click here or the photo

Saturday, 29 October 2011

Halloween Week - OPI Spookettes Swatches Part 2 I Only Date Werewolves

Next up from OPI Spookettes is I Only Date Werewolves:


I Only Date Werewolves is a standard Black Creme, nothing overly unique about this shade, the formula is great though, and it reached full opacity at 2 coats with a lovely high gloss finish. 


OPI Spookettes set consists of 4 mini polishes, (1 is a glow in the dark colour) and a sheet of Halloween themed water nail decals. To see more swatches of all the colours from this range click here or the photo

Halloween Week - OPI Spookettes Swatches Part 1 Mummy Knows Best

With Halloween a few days away its time to have a peek at some Halloween themed polishes, first up will be OPI's mini set for Halloween 2011: Spookettes. First up is Mummy Knows Best


I'm pretty sure this is just OPI Alpine Snow renamed for Halloween. Mummy Knows Best is a white creme polish, it's nice to have a new bottle actually I forgot how nicely this one applies when its new, unfortunately my Alpine Snow is a little on the gloopy side these days, must add some Seche Restore. Nothing overwhelmingly unique about this shade, it was opaque in 2 coats. This will always remind me of the days of applying tip ex to the nails (ahhh youth hehe). I have a feeling this shade will work well as a base for the glow in the dark colour from this collection! It's probably good to have for french tips as well, as the mini brush makes the tips slightly easier to apply! 


OPI Spookettes set consists of 4 mini polishes, (1 is a glow in the dark colour) and a sheet of Halloween themed water nail decals. To see more swatches of all the colours from this range click here or the photo

Monday, 17 October 2011

French Tips with China Glaze Street Chic and OPI You Don't Know Jacques Suede

I really enjoyed wearing China Glaze Street Chic, while reviewing the Metro collection. I wanted to try out an "alternative" french manicure, and instantly OPI You Don't Know Jacques Suede, popped in my head as a good colour to compliment the mocha taupe tones of Street Chic, here is the mani:


quite happy with how this one turned out, I'll definitely be using the OPI Suedes for tips more often :D

Saturday, 24 September 2011

OPI Nice Stems Collection Overview

So to finish OPI Nice Stems Week, here is an overview of the four polishes, you can click on any of the photos or names to travel to the detailed post about the colour, where there will be more photos and info on each polish :), I'm also going to list the polishes in order of preference, which isn't going to be easy with this set at all! So with out further ado


    1. OPI - I Lilly Love You (Glitter top coat)         2. OPI - Be A Dahlia Won't You 

               3. OPI - Play The Peonies                         4. OPI - Come To Poppy

(Click on any of the photos to see more swatches and full review of the polish)

If you're a fan of bright summery pinks, this is definitely the collection for you, all three colours apply flawlessly and are opaque at 2 coats except for Be A Dahlia Won't You, which took 3 coats (like most glass flecks). I Lilly Love You is a gorgeous glitter top coat which adds a stunning shimmering confetti look to all three colours. The set is available full size or as a set of 4 mini polishes.

Thursday, 22 September 2011

OPI Nice Stems Week - Skittles with I Lilly Love You

Last up in Nice Stems Week is The Star of the Show: I Lilly Love You, First up some skittles with I Lilly Love you on its own on the pinkie. (scroll down to see I Lilly Love You over the rest of the colours)

L-R Be A Dahlia Won't You, Come To Poppy, Play The Peonies, I Lilly Love You

L-R Be A Dahlia Won't You, Come To Poppy, Play The Peonies, I Lilly Love You

L-R Be A Dahlia Won't You, Come To Poppy, Play The Peonies, I Lilly Love You

All Of Nice Stems with I Lilly Love You 
L-R Be A Dahlia Won't You, Come To Poppy, Play The Peonies, I Lilly Love You

L-R Be A Dahlia Won't You, Come To Poppy, Play The Peonies, I Lilly Love You

L-R Be A Dahlia Won't You, Come To Poppy, Play The Peonies, I Lilly Love You

I Lilly Love You is definitely a layering polish! packed with gorgeous multi colour iridescent glitter flakies varying in shape and size in a pink jelly base. As underwhelming as this shade is on its own, it completely takes on a new life when worn over the other colours from this collection, I'd be hard pressed to pick a favourite combo because they all look so stunning! The best thing about this glitter has to be the crazy random flake shapes, they really look like confetti, and make this polish unique!

Tuesday, 20 September 2011

OPI Nice Stems Week - Be A Dahlia Won't You

Next up in OPI Nice Stems Week is Be A Dahlia Won't You


Be A Dahlia Won't You, is a gorgeous cool toned bright pink glass fleck polish, this one is the most shimmer packed of the bunch, and if I didn't already own China Glaze Ahoy and 107 Degrees (also pink glass flecks) I'd probably be going crazy about this colour! 107 Degrees from China Glaze Island Escape Collection (summer 2011) is definitely the closest colour to this, however Be A Dahlia is ever so slightly more muted, and not as "neon hot pink" as 107 degrees, all the same I do love both shades. I'm a massive fan of glass flecks and simply can't get enough of how multi-dimensional they look as they shimmer in the sunshine! Like most glass flecks this was on the sheer side, but 3 coats gave a perfectly opaque coverage! Dazzling!

China Glaze - 107 Degrees
click pic for original post

 OPI - Be A Dahlia Won't You